You don’t need to travel too far to find an interesting skyscape. Warm days and cold days throw up different light, sunsets and sunrises full of drama. When capturing the sky, catching the light is everything, so patience is important. Armed with a tripod and a wide-angle lens, go outside and take a look!1
Dealing with Light
When shooting photographs of the sky, the finished image will depend on the light you have. A grey overcast day will result in fairly dull images. If you can wait for a sunset or when there are dramatic weather conditions, the sky can often produce strong blues and oranges. Put the camera on a tripod, and set the camera to AV (Aperture-Priority) mode. Use a wide-angle lens and a small f-stop (between f/11-f/32) for a greater depth of field.2
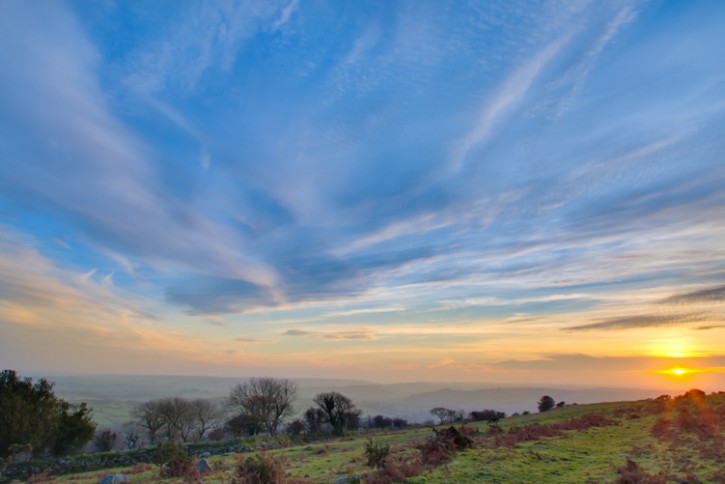
Sunrises and Sunsets
Sunset will give you strong reds and oranges. Sunrise and sunset photos are taken during the “golden hour”, which is the first or last hour of sunlight. For this photography, use a tripod and a wide-angle lens. Set the exposure compensation mode to -1 or -2. Underexposing the scene will increase the saturation of the colors. Choose a small aperture for a wider depth of field, and wait for the sun to go behind the tree to avoid bright glare.
Dramatic Clouds
Look out for grey clouds and potential storms approaching. To capture drama, you need to look for the sun peeping out of the clouds and backlighting them. Without this light the clouds will just appear as a dark mass. Often the sun will appear after a rain storm. You can’t control the sun, so be patient and wait. Use a sturdy tripod in case it gets windy. Set the aperture to f/11-f/32 for a deeper depth of field and wait for your moment.4
Portraits and Skyscapes
If you want to incorporate a portrait into a skyscape, wait for dramatic skies. If photographing during a darker time of day, place your subject in the foreground, making sure they are in focus and use fill-in flash to illuminate the subject. As long as the distance between your subject and background is great enough, the sky should remain unaffected by the flash.
Creating Great Panoramas
Skies are ideal for panoramic shots. Even if you don’t have a super wide-angle lens, you can still create the panoramic effect by stitching separate photographs together later by using Photoshop. Use a tripod, and make sure the horizon is straight. Take one shot using either the self-timer or a remote release and then turn the camera along the horizontal slowly to the next part of the sky leaving a slight overlap (so you have some of the last shot in the new one).
Take at least 3 photographs one after the other in a row. You can use Photoshop or various other programs to join the images together, provided you had no vertical movement on the tripod. A slight over lap makes it easier to match up the edges. The overlap is critical because any gaps will ruin the effect.
Source:https://www.exposureguide.com/